![](https://blogger.googleusercontent.com/img/b/R29vZ2xl/AVvXsEibKd2mczG4oyc545f4cTe4dk37hcme1Ghl2OpjVa3zDLoTxr1RePuJcrB654w7GkleOA2KBB3oULXWY6qQXxWvo5e8Ak93bbfbKCpXUvAjHURGuDuX0c5MPUbybJmJ0YiKQdAclpFeEoxq/s400/01+drawing.jpg)
I began work on the Tree of Life commission this week. The first thing that I did was use Photoshop to enlarge the drawing to full scale (36" wide by 37" high). I had to trim and print off pieces of the image, as paper is only 8-1/2" x 11". I put the separate images back together like a puzzle.
![](https://blogger.googleusercontent.com/img/b/R29vZ2xl/AVvXsEhDNjBDWbF18B0wARedNBx8SZhsb0OTKMiDTiPbZoyFhBUEBdr5pioaHFZm6v1rmkSy2ZB6_GOPNlPmR5862tvsQaFRPl_nt_EAnefg5WkARbbjVDrXt1IJ2_EJMB81iQ_tJfKa-HF4lsQ8/s400/02+armature+base.jpg)
Then, I cleared a spot in the clay studio and started gathering everything together. I found a work stand of the right size for the project and cut pieces of plywood to make an approximation of how the granite base will hold the bronze tree. I didn't fasten the wood together at this point, as I want to build this base securely around the tree armature when it is almost finished.
![](https://blogger.googleusercontent.com/img/b/R29vZ2xl/AVvXsEgSaAarpNwjGpwAshywZJSEJPF8W6uulsCVFauBQ7ZxGyi81mTtCUEkn29w2boX5Zni6Ne8Pv5QHxa7-rUdvVIOSsddgPNhJMUbLlCm0hHQ8gW8dhExva4f9RmKWlQulAh_XuXyouSfmFM0/s400/02+copper.jpg)
I decided to use copper tubing for the main support inside the branches. I can bend it easily with a pipe bender (shown), making it possible to adjust at any time throughout the project.
![](https://blogger.googleusercontent.com/img/b/R29vZ2xl/AVvXsEgLZbESXMUPNvbOQydIJ21S01Q-5DWfr3v1XQBwKJxhFKnf6X2T8VSxpAlH1iwm_yl2yV37Tz614mf6WBCh2l898zYUDDADT1bSt_41L3skeEwbPmZ6pahJiseO7GpTVHUhJxqxF8dwXpFf/s400/03+bend+pipe.jpg)
The main support for the armature is a piece of galvanized pipe and a floor flange. It's position was carefully measured and marked onto the full scale template. I used a piece of cotton rope to find the length of each curving branch. That gave me the correct length for each piece of copper tubing. I kept bending and checking each piece against the template. When I finished one, I'd lay it on the drawing and begin the next.
![](https://blogger.googleusercontent.com/img/b/R29vZ2xl/AVvXsEgIqvCRQTdBsuu3Tg5ZsaumDohG3dsgdjXIZRgi7xoakZHuVOTUmKwnai0UO43FZ2aIYCnittDCD7SZ285e1D90FClyrzUTWPL6CtkC6sKMs-k_VfKPlWx6sc1UX47cwHj_UxNlfChlW55S/s400/03+tie+w+wire.jpg)
When all of the branches were laid out correctly on the template, I used aluminum wire to fasten them together. I also twisted wire over all of the copper to give the clay something to hold onto, rather than smooth pipe.
![](https://blogger.googleusercontent.com/img/b/R29vZ2xl/AVvXsEhS_sfWZ8iYl8nQMNbZ5vGe2tWT77ybDISCKlo3-fkTgNpsTeFVU94u4kcRmJWSNaJn4D1yXp95g8_eC7CmHjV1uoQX-OUeSWexnd8UEMrSl5kTyddMtHyPDa8MC9-2PcpTDJPB5N3qT3Cx/s400/04+tree+in+base.jpg)
I screwed the floor flange to the base board and fastened the plywood base around it. I used aluminum sheet for the radius of the notch for the tree roots. This gives a fairly precise approximation for matching up with the granite base at the end of the project.
![](https://blogger.googleusercontent.com/img/b/R29vZ2xl/AVvXsEifvl2Fi4y05RuLOR1Op8suCfwkcnCE5OGeR35_g5RQmFjUtwWcqig7uV4bvuue7C2iVZoKmdRuwZ-FBG6ys3x9zbtbDkMQqJdn7ip4CtlScZuhVW4c8VqUG23YLl9_y8EcMaDA_VQWsffE/s400/05+armature+w+leaves.jpg)
Next, I made 61 leaves in aluminum wire and added them to the copper branches. It has a pretty cool look at this point (almost hate to cover it with clay).
![](https://blogger.googleusercontent.com/img/b/R29vZ2xl/AVvXsEgyxuTKJfCfSaSqQXxm4bBVWwhz2q7hWRAi6TTU2LiTPO4Gw6OWH6Yj9o8nlMlIu_5ZIYjoFrEA0kvJZY0MXbPkckT4hBPvi9b23tk3x-EHFSPX7S8oAd0N3adtY9-qPkv6gB1Bi9UwB0v8/s400/06+side+view+armature.jpg)
This is the side view that shows the dimensional aspect to the tree. This will become more apparent as I start adding clay tomorrow.
![](https://blogger.googleusercontent.com/img/b/R29vZ2xl/AVvXsEh9Pv_OQrjHns77v4Sqil0mQ1RKRH_IVKehPItgSgkmzErBMRMYu9O5WTxsu4PyN6OMZMhq8KoybfA7X44I2OAs1txbuMoFL7vk7pKBr4YibyctNWza76EOvi3NkWgsaGkyJWIa1HpfY36J/s400/09+deer.jpg)
The highlight of the week was the boat ride that our neighbor gave us - the most fun we've had in a while. He jokingly called it "The McMillen Wildlife Tour" as we saw: this deer calmly crossing Yellowbank creek in front of us...
![](https://blogger.googleusercontent.com/img/b/R29vZ2xl/AVvXsEiNegUm4v9tf4kq2Y-9ccdNMliRnhXkNNr6ubpWF0p4NkmxTZ-bX1Jm3c8XUgk5rhLVO7NNtScptNs9A2G5WvI1PCXun1IEdufalc8ai8Gam8Es3rVtYtQrhdH26VAowAh1e05QQBxprI5g/s400/10+baby+coons.jpg)
...and these 3 baby raccoons bumbling along, looking for something to get into...
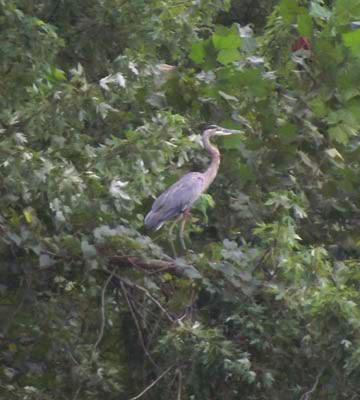
![](https://blogger.googleusercontent.com/img/b/R29vZ2xl/AVvXsEi2T67nZyLwYlZ-yP0JBlZWbK4rriAidm00IYsiWKiO-UKnOMLUreeRIn8JtnwrTUe0PNFTLBUWPIuW1EllLbyVY-gbIcQVojQ7pR8hVi7NNJpLM6mVIf8dGxoDNXXF5kmPVP98M13MsRhR/s400/11+blue+heron.jpg)
...a common sight of a Great Blue Heron...
![](https://blogger.googleusercontent.com/img/b/R29vZ2xl/AVvXsEj9zdGHws8K5MpxKyIJu2ui9u17dEaaFKUGaffGZCOD0gD6JuRgTIxqqbPK9cm812C5XDFCSytFyR5vB7fSD94Ta308mWA3fWbsxaw7jqlrH9X5VRRqGRZN-dyn4Rrkjs9JT_kysFsa6GQL/s400/12+eagle.jpg)
...and the rare sight of this juvenile Bald Eagle at the mouth of the creek, where it meets the Ohio. etc. etc. (Meg took 273 pictures - all photos of wildlife copyright Meg White).
No comments:
Post a Comment